How Tos
How to Take Screenshot on Any HP Computer
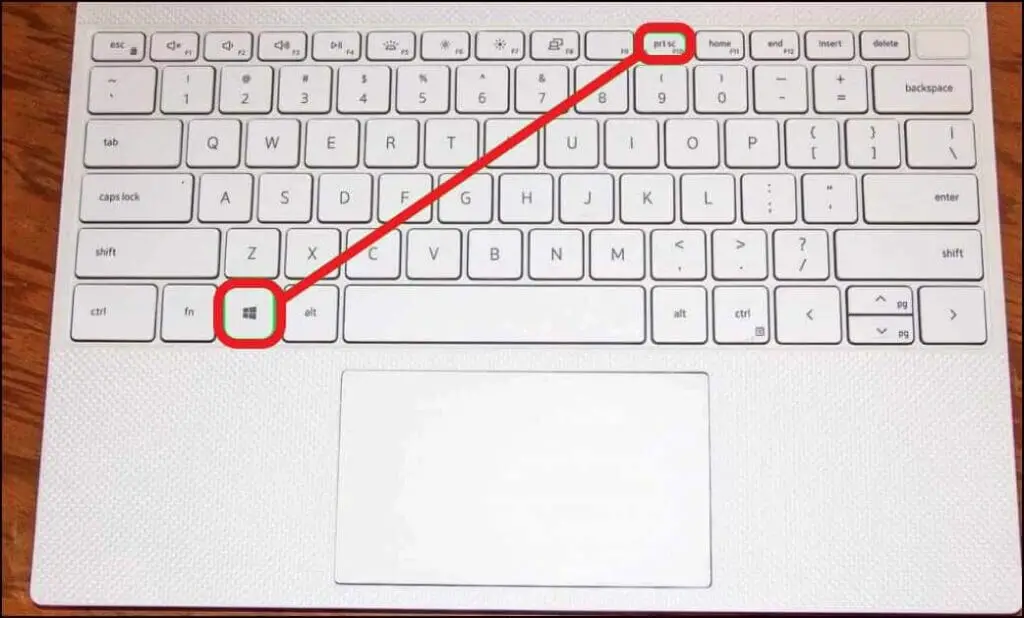
Today computers are the core of many professions. They perform various tasks throughout the day, one of them is compiling important documents. It’s no wonder that screenshots are among the most beneficial tools available. What exactly is a screenshot and what do I need to know in order to take one?
There are many methods to capture a screen using an HP desktop or laptop computer, ranging from using the Printscreen button on the keyboard to using a screenshot application. Whatever the device, the user can select the best method suitable for their needs.
In this article, I’ll examine the various ways you can take a screenshot on your HP notebook or computer desktop.
I’ll give step-by-step instructions on how to take a screenshot without the PrintScreen button, on how to take a picture on different HP devices, where images are saved and can be found, and lastly how to sort the screenshots.
How to Capture Screenshots on an HP Laptop Without Printscreen Button
As I said in the past, the Printscreen button is the most popular method of taking a screenshot.
But, there are alternative methods to capture a photo on your HP laptops, without using the Printscreen button. I’ll discuss them below.
Some users aren’t able to include their entire screen in one image. This could be due to many reasons.
Maybe there’s some important information that should be removed, or the user wants the screenshot to look appealing, so they’d prefer to not include details like the taskbar. Or they’d like to cut out some specific information.
In this case, the snipping tool is the best option. It allows users to choose only a specific portion or even a portion of the screen. The Printscreen button, however, captures the entire screen. Any adjustments would need to be performed within a separate program such as an app for editing photos or Paint.
To utilize the snipping tool available on HP to take screenshots, users should use these instructions. To begin, use the Windows key + Shift + S at same at the same time. A menu of options will appear that includes snipping tools.
First, there is a tool a rectangular snip which permits you to move your mouse over the screen to select an area that you would like to snap. The tool on right will be the freeform-snipping device that lets users sketch around the desired area to capture.
Window snip and full snip enable users to capture a photo of a window in use or larger portions of the screen or the entire screen.
The majority of users must save their snapshots manually. To save them, visit an image or photo editing application such as paint, click Ctrl + V, and copy the image, and save the image as an image file like JPG or PNG.
How to Screenshot on HP Pavilion
The process of taking a screenshot is the same for all machines that are in use. For the HP Pavilion, it is the simplest method to capture a screen is to use the PrintScreen option. It’s the same method I described earlier.
If users have the screen they want to photograph open they are able to choose to hit the Printscreen button, which copies the image onto the clipboard on the computer. The clipboard functions as an area that is held by the most recent thing you’ve saved on your computer.
This means that it cannot be automatically saved. To access it, users have to launch an application that allows editing images. I’ll give a few methods here. The choice of the method is contingent on where they wish to save the photo and how they intend to utilize the image or for what reason.
One example is to capture a photo to paste to a PowerPoint document, MS Word document, an email, or even an Excel spreadsheet. They could then copy and paste the image or make use of to use the Ctrl + V shortcut key to copy and paste the screenshot they took onto the clipboard.
If the user wants to edit the screenshot, or simply want to save the photo to save it to a file format, then they should use the image editor tool. HP Pavilion comes with tools like Paint and the clipping tool, or even apps such as PhotoShop.
For Paint users, all they have to do is open the app, copy the image into the app, then use the tool for cropping to choose the portion they wish to incorporate into the image, then select the crop option.
To save the image in an image format users just go to the file, save or save to choose an image they wish to save and save the photo to the desired folder on their computer.
How to screenshot on a HP Windows 10 System
There are several easy methods to capture a screenshot for HP Windows 10.
When it comes to taking images of screens using Windows 10, users can pick a method according to their requirements or preferences. I will review some of the built-in and external applications or methods for capturing screens.
The most effective method is to capture an image with the Snip & Sketch tool. I have previously discussed this tool and also mentioned that it could be used by pressing the Windows button, the shortcut Shift, and S. You can then take a snip and save the image.
It is also accessible through searching for the app using the search bar on the Menu. Users who regularly utilize Snip & Sketch frequently Snip & Sketch tool to take screenshots can install the app on their taskbar.
It is done by dragging an icon on the taskbar, then selecting the option to pin it to the taskbar.
The screenshot will be saved onto the clipboard. After users snap the picture the image will be displayed in the notification for a short amount of time.
Users are able to open it via clicking the icon which appears. Or, they can select the notification icon and then locate it and download it onto their computer.
To automatically record the screen and save it for later users hit the Windows key or Printscreen. Screenshots are saved to the Pictures file, which is located in Screenshots, a folder.
Another option Windows users may like to take is a screenshot of a window in use. It is easy to do so simply by using the Alt button and Printscreen buttons.
The screenshot will be copied to the clipboard. Users can then paste the screenshot to an editor for image and save it.
How to take a Screenshot on an HP Chromebook
The HP Chromebook is a device that runs Chrome OS rather than Windows or macOS. It is ideal for those who need only access to Google applications and Android applications like Skype, WhatsApp, and many more.
Since it has an operating system that is different and a camera, taking a picture is different. Users of Chromebooks will be acquainted with “Show Windows Key” which is the sixth button on the upper row. It’s a look-alike of an actual computer screen, with two lines to the right.
How do you capture the full Screen
To take a photo that captures the entire screen, click the keys Ctrl and Windows. When the screenshot is taken, a tiny window will appear at the bottom side of your screen. It displays a preview of the image taken.
Users can click the preview icon for the preview to launch the image. If the image is only required to be opened at a later time the user can access the folder of files on their Chromebook.
It is easy to access this directory by clicking on the icon of the file, which is blue and features an image of the folder in white.
How do you capture a partial Screen
Sometimes it’s not necessary to capture the entire screen, or users may want to keep certain information out of their screen. Chromebook users can take an image of a small portion of the screen by following these steps. The first step is to use Ctrl + Shift + Show Windows.
The cursor transforms into the form of a cross-hair. The user should drag the cursor’s crosshairs from the corner’s starting point until the region they wish to capture is chosen. This is accomplished by pressing the mouse or touchpad button.
When the desired area is chosen and the user presses the touchpad or mouse then the screenshot is saved. They can be accessed in just like full-screen screenshots.
How do you edit a screenshot
I’ve explained the process of editing a screenshot on laptops or computers by making use of editing software. To edit a screen using the Chromebook users need to take these actions. The screen you have captured will be opened in the file folder.
The image is located under downloads or images. You can open the screenshot with the Gallery application. It will show the tools in a row on the top. Users can make use of the tools to crop, rotate, scale and alter the lighting.
Users can save the image and create a duplicate and save it if they wish to keep the original screenshot also.
How to Capture Screenshots on HP Elitebook
HP Elitebooks have been designed with the power user in business in mind. This series of notebooks can be used at home or in the workplace. HP Elitebook is the laptop version and a camera, taking a picture would be similar to doing it on desktop computers.
In the case of using the HP Elitebook, users can capture a screenshot using Printscreen. If the screen they want to take a screenshot of is opened, they are able to proceed by pressing the Printscreen button, which will copy the screen into the clipboard.
In the event that users need to edit the image or just would like to save the image for sending in an image format, they will need image editing software. Make sure you save the edited image.
Because HP Elitebooks are the cream of the class, they are utilized by those who require a device that can handle various activities and tasks. It is also likely that users can do using a screenshot application with more features. ShareX is an excellent option.
ShareX is an open-source application that offers screen-shot features. It includes tools to assist in recording screen images in a variety of options, such as regions, full-screen active window, web page an active display, text, and many more. It also allows uploads of files to over 80 destinations.
To take a picture using this application, users must start the app after it is installed. Choose”Capture” in the Menu. Select the screen they wish to capture. For capturing a full-screen image, choose the full-screen option.
After being taken, the image will be displayed at the bottom right of the screen in preview. Users can click to open it in the location it was saved.
How to screenshot on a HP Laptop with Windows 8.
People who own an HP laptop that runs the Windows 8 operating system can effortlessly take a photo. It’s because Microsoft has built-in software for taking screenshots. I’ll guide you on the process of how to make use of this feature.
Users must hit the Windows key and PrintScreen key simultaneously. The screenshot will be copied to the clipboard, a temporary space on your PC. The user should make use of an image editor to copy the image. They can edit it, save the image or save it if they do not require a complete view.
To access the screenshot, users can use”E” on the Windows button or “E” on the keypad. This will activate the quick access feature. Users are able to navigate to the icon for pictures to the left, which is where the screenshots folder will be found.
To capture a small portion of a screenshot it is possible to make use of to use the Snipping Tool. To use it, users must navigate to the menu, look to find Snipping Tool. To access the Snipping Tool, right-click on the Snipping Tool icon and say Open the file location.
Users need to click to open the Snipping Tool shortcut. A window will appear where users can choose which mode they require. If you want a limited screen one of the most effective is the Rectangular Snip after which hit the Try Snip and Sketch button.
A second window will pop up Choose new, then make use of the crosshair cursor in order to select the part of the screen you wish to capture. Screenshots will then be saved to the new window. Users can edit and save the screenshot or save a portion of their screen.
How to Make Screenshots for Screenshots HP Elite x2
Taking a screenshot using a device like the HP Elite x2 is slightly different than taking one using a computer or laptop. It’s because the device is a tablet. It has an 11.60-inch display that has 1366×768 pixels resolution.
It is, however, possible to capture screenshots. I’ll show you how to do this here. It may seem complicated initially to do it correctly, but it’s not difficult. Users need to hold on to the button to turn up the volume as well as the power button for a couple of seconds simultaneously.
The screenshots are accessible by visiting Photos and then clicking on screenshots.
Where are the Screenshots stored HP Laptops or Desktop Computers
As I’ve said several times in this post Screenshots are typically transferred onto the clipboard. In certain instances, users need to open an image editing application to save or modify the image. Certain smartphones automatically archive screenshots to an appropriate folder within Pictures and are accessible.
The drives are available for HP as well as Windows users can utilize them to save and back up images.
For certain users, this could be a crucial and essential purpose. It could be that their work is sensitive or their work requires them to take regular screenshots. Whatever the reason I will discuss some of the most important screenshots in this article.
How to save Screenshots to OneDrive
Let’s begin with OneDrive. It’s an online storage platform that is accessible to those with a Microsoft account. Users are able to log into OneDrive using your Microsoft account to enable it. I’ll explain how you can set your screenshots to automatically save them to OneDrive.
Users have to right-click for the OneDrive icon. This icon will appear located on their taskbar or be opened by selecting File Explorer from the menu. Click on it with the right-click OneDrive folder and choose options. Choose the Backup tab.
Choose the screenshots you want to save and then tick the box to automatically save screenshots you take to OneDrive. Make sure you hit OK. To directly send screenshots to OneDrive users, you can use Alt + PrntScr keys.
Users can view the images stored in OneDrive via the internet or by navigating to the folder for screenshots. Users can access this by opening the File Explorer, selecting Pictures, and then going to the Screenshots folder.
How to Save Screenshots on Dropbox
It’s also possible for images to be saved to Dropbox. Users can set their settings to save snapshots to Dropbox in a way that is automatic, and here’s how to do it. The first step is that Windows users must download the Dropbox application to their PC.
Start the Dropbox desktop application preferences, then select the Backups tab, then select the box that says Save screen captures and screenshots for your Dropbox.
Users can view these screenshots via their Dropbox app, or when logging into Dropbox via the internet.
How to Locate Screenshots
There’s nothing more annoying than trying to locate the screenshot quickly but it can be difficult and time-consuming. This can happen if one takes a lot of frequently-taken screenshots, and they’re not sorted in a manner that is easy to locate.
In Windows, Screenshots are typically saved according to the dates and time of capture. It can also be set to begin at the eldest date, and then move up to the most recent dates. The names of the images indicate the date on which the photos were captured.
Users can sort them in accordance with their preferences. I will go over these options in this article. Screenshots can be classified in accordance with Name Status, Date Size, Type Tags: Date of creation or modified Date taken Dimensions, or Rating.
To choose the filter you prefer, navigate to the screenshots folder within the Pictures file. At the top of the menu, choose the View tab. Click the down arrow on the icon for Sort by. The choices will appear in the drop-down menu.
Sorting preferences are based on the purpose of the images to be used for, and they can also be modified in any circumstance to assist the user to locate them faster. You can also choose ascending or downward. I’ll provide a few examples.
If the importance of names is high, then the user will likely name their images. They could categorize them by name, then ascending or descending to arrange them alphabetically. There are more advanced categories for sorting pictures.
They can be accessed through the icon for Sorting by and selecting the Choose Columns option. A comprehensive list of methods to sort by will be displayed. Users can search these lists for more specific sorters to their industry.
Conclusion
It is simple to record edit, save and share screens with the most recent software. It can be done with a variety that I’ve discussed in this article.
It might take some time initially however once they become comfortable with a system that is efficient and takes screenshots, it becomes an automatic process.

-
 List7 months ago
1337x Proxy List For 2022 [100% Working 1337x Mirror Sites]
-
 Explained7 months ago
Why Did iMessage Turn Green Explained!
-

 How Tos7 months ago
How To Get A Specific Phone Number for yourself?
-
 List3 years ago
11 Best Music Players for Android Auto
-

 Explained7 months ago
What is Android System WebView? Should You Delete it?
-
 How Tos7 months ago
How To Fix This Webpage Is Not Available Error In Google Chrome
-
 Explained7 months ago
How Can Monitors Be Connected By USB? (Explained)
-
 Gaming7 months ago
Why Can’t I Connect to 5GHz WiFi On PS4? [Solved!]

