How Tos
How to Fix an Audio Renderer Error in Windows
Are you experiencing issues playing YouTube videos with your browser?
And are presented by the Audio Renderer Error message?
When you attempt to play a different video with an integrated video player or YouTube video in an alternative browser, you’ll get an “Audio rendering issue. Restart the computer” message appearing on the screen.
The most frequent cause for this problem is a problem with the connection, incorrect sound settings, or an issue with the driver for audio.
If your Windows 10 computer does not play any audio or video file, and the message “Audio rendering error. It is recommended to restart your system” occurs while playing the YouTube video, try the options listed below to resolve the issue.
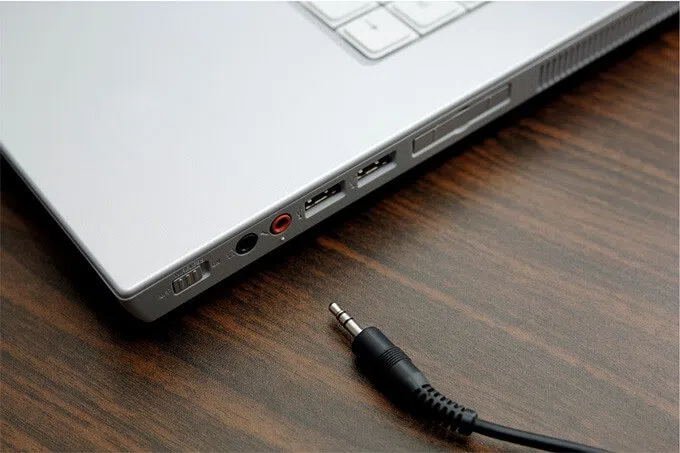
Unplug/Replug the Sound Device
Do you have an audio wired player (such as headphones) that is connected to your laptop? If so, remove it and play the video on YouTube.
If you do not encounter this YouTube rendering error with audio, reconnect the device. It’s a simple way of solving the issue permanently.
A couple of external playback devices that are connected to your computer could result in a YouTube Audio renderer error.
In this case, you should make sure that the playback device used for default is connected, and then remove the audio device from the second. Check if this resolves the issue. No luck? Check out the rest of this article.
Close Audio Mixing Programs
Mixcraft is one of the audio mixing software programs. Mixcraft can be able to take control of the audio drivers blocking your browser from using the drivers. If you’ve got another similar program on the go, stopping it completely prior to watching YouTube will aid.
You can also stop these applications from taking over for your sound devices. In Mixcraft for instance navigate to the File > Preferences > Sound Device and switch off the switch that is next to Exclusive Mode.
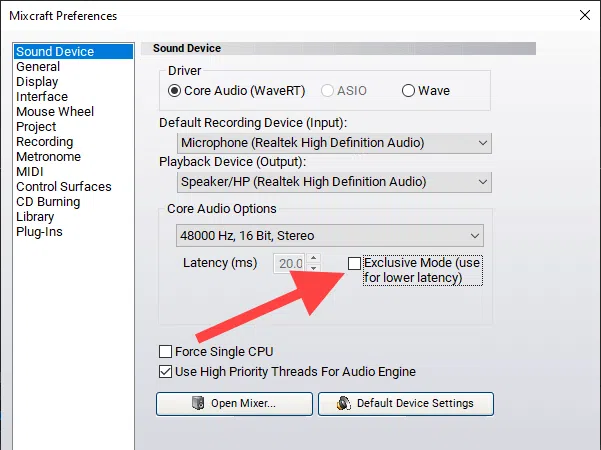
This can cause delays when running the program, so be sure to activate Exclusive Mode (or an equivalent) as needed.
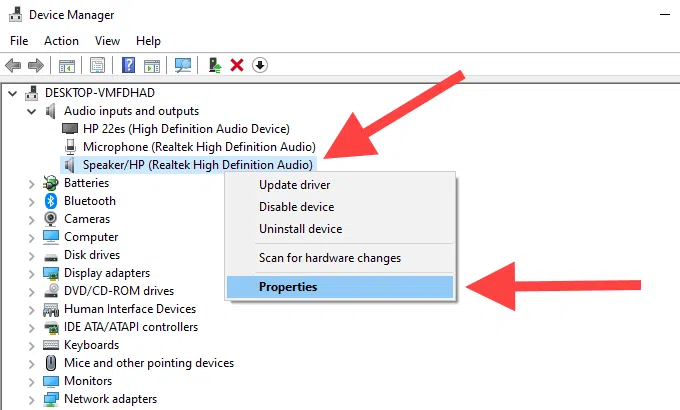
Disable/Enable Sound Devices
Enable and disabling the audio playback device that defaults on your computer is a powerful fix that will fix the audio renderer issue in Windows 10.
1. Right-click on the Start button and choose Device Manager.
2. Expand Audio outputs and inputs.
3. Right-click the default audio device and select to disable the device.
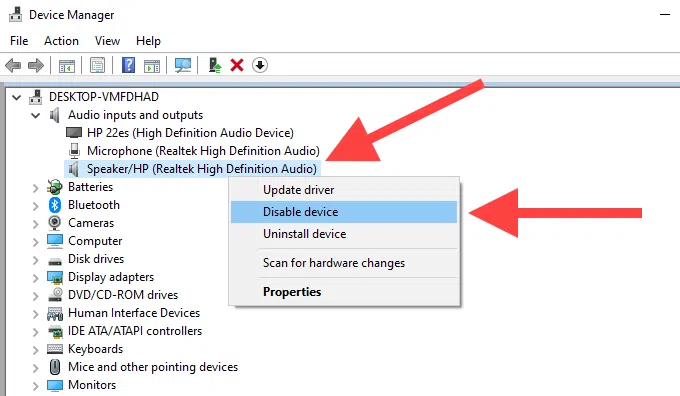
NOTE: If multiple devices are listed, choose the Volume icon in the tray on the system to identify your playback device of choice.
4. Click “YES” for confirmation.
5. Make sure to right-click on the audio device and choose to enable the device.
Run Audio Troubleshooter
If you’re still seeing this YouTube Audio renderer issue, it’s the right time to make use of the audio error troubleshooter built-in feature in Windows 10. It can assist you in fixing the root of the issue.
1. Start to the menu, select the menu then search for troubleshooting settings, then click “Open”.
2. Choose the option that says, Other Troubleshooters.
3. Choose the option Playing Audio Select Playing Audio, then choose run the troubleshooter.

4. Follow the on-screen directions as well as suggestions for resolving problems related to your audio device.
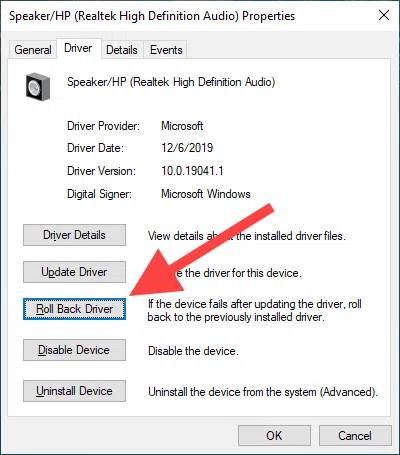
Rollback Audio Drivers
Have you noticed that the YouTube audio renderer error starts to appear after updating or reinstalling any device that plays audio or card drivers?
If so, you can try rolling back the error.
Notice: You can’t use the Roll Back Driver option as described in the steps below if your audio drivers aren’t up-to-date. your drivers for audio.
Audio Playback Device
1. Right-click on the Start button and choose Device Manager.
2. Expand Audio outputs and inputs.
3. Right-click on the default audio device and then select the Properties.
4. Go onto the Driver tab.
5. Select Roll Back Driver.
Audio Card Drivers
1. Expand the Video, Sound, and gaming controllers section of the Device Manager.
2. Right-click on the driver for the audio card and then select Properties

3. Change onto the Driver tab.
4. Select Roll Back Driver.
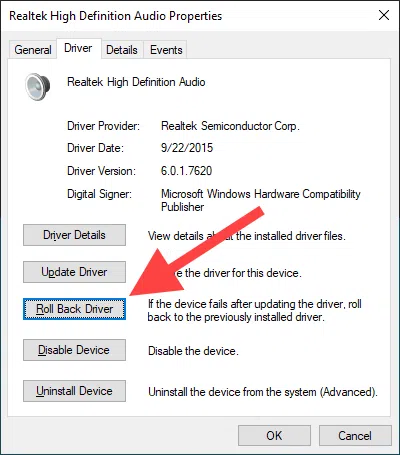
5. Repeat steps 2-4 if you see multiple audio drivers.
Update Audio Drivers
If you are unable to reverse your audio driver (or should you find that it didn’t solve an issue with the YouTube audio renderer issue) you can do the opposite and upgrade them instead.
Audio Playback Device
1. Right-click on the Start button and choose Device Manager.
2. Expand Audio outputs and inputs.
3. Right-click your default output device and choose Update Driver.
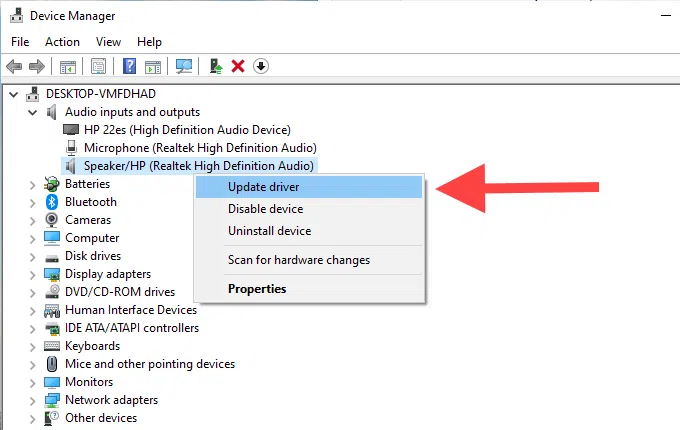
4. Choose the Automatically search to find drivers option to install the latest driver updates, if they are available.
Audio Card Drivers
1. Expand the sound, video as well as game consoles in the Device Manager.
2. Right-click the sound card driver and then select the Update Driver option..
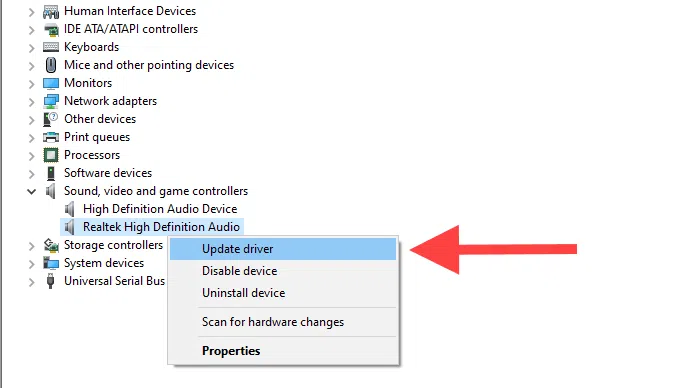
3. Repeat step 2 if you see multiple audio drivers.
Update Windows 10
Did you recently update Windows 10 recently? A system that is not up-to-date can cause various technical issues and anomalies to pop up. If you don’t have it, take action now.
1. Start your Start menu and search for Windows update and then hit Enter..
2. Choose the Updates tab to install updates that are they are available.
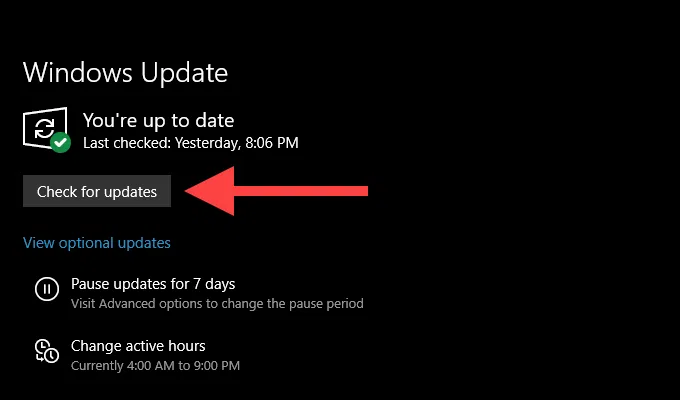
3. Choose the Optional Updates (located under the Updates buttons) for installing any audio-related updates in the event that they are there are available.
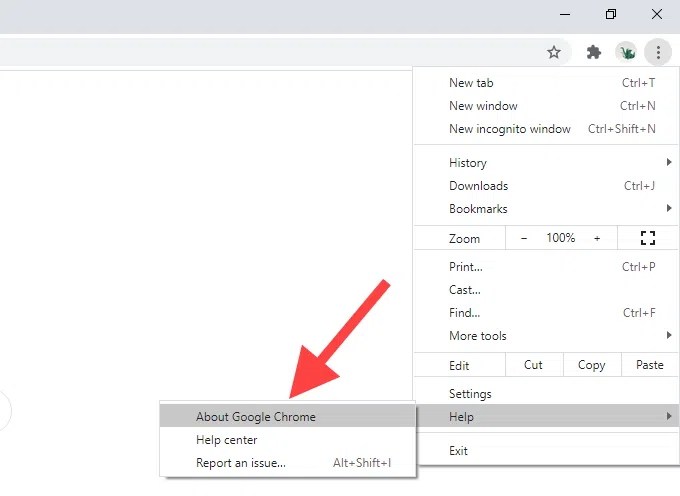
Update Web Browser
A browser that is not up-to-date may also cause problems in websites like YouTube.
While browsers like Chrome and Firefox are designed to automatically update, however, it’s an excellent idea to double-check.
Within Google Chrome, open the menu in Chrome click on Help, and then choose the option to learn more about Google Chrome.
To use Mozilla Firefox, open the Firefox menu click on Help then choose More Information Firefox.
Within Microsoft Edge, open the Edge menu where you can select Help and Feedback then click More Information Microsoft Edge.
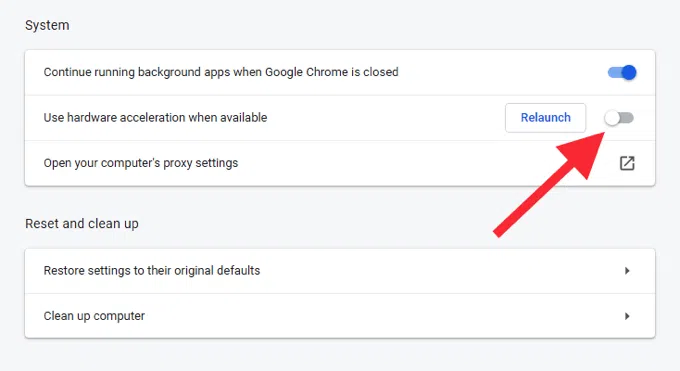
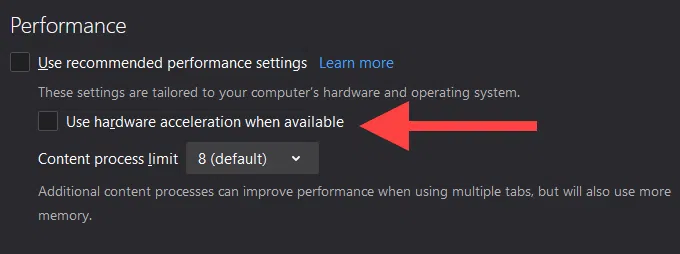
Disable Hardware Acceleration
The browser you are using uses hardware acceleration to improve speed.
However, this feature is well-known to cause YouTube-related problems in random ways.
Remove hardware acceleration and test whether this resolves the issue with the audio renderer within Windows 10.
Google Chrome
1. Go to the menu in Chrome and then select Settings.
2. Integrate the Advanced and select the System.
3. Switch off the next to Hardware acceleration, if there is one.
Mozilla Firefox
1. Start your Firefox menu and click Settings.
2. Scroll down to the General tab until you reach The Performance section.
3. Check the next box Hardware acceleration if it is available.
Microsoft Edge
1. Start Edge, then select the Edge menu and then select Settings.
2. Extend the Advanced and select Systems.
3. Then, turn off the switch to Hardware acceleration if it is there is one.
Switch Browsers
Sometimes there are instances when it is possible that the YouTube audio renderer issue can be specific to a specific browser. If you are using Chrome for example you can try switching to Firefox or vice versa.
Update BIOS
The forum chatter suggests upgrading the BIOS (Basic Input/Output System) as a possible fix to fix an issue with the YouTube audio renderer error particularly on laptops manufactured by Dell. But, it could put your entire system at risk if it is done improperly.
If you decide to do this we strongly suggest you read through the BIOS upgrade guide to find out everything you must be aware of the process.
Start Watching
Hope that the troubleshooting suggestions above will help you solve this YouTube audio renderer problem on Windows 10 for good.
If you have any other solutions that have worked for you, make sure to share them with fellow readers in the comment section below.


Why Did iMessage Turn Green Explained!
You may have noticed that text messages in the Messages app on your iPhone can be green or blue. What’s...

How To Fix Microwave Interferences With WiFi
Are you experiencing constant WiFi problems with interference? Your microwave could be your culprit! Repairing microwave interference in the WiFi signal...
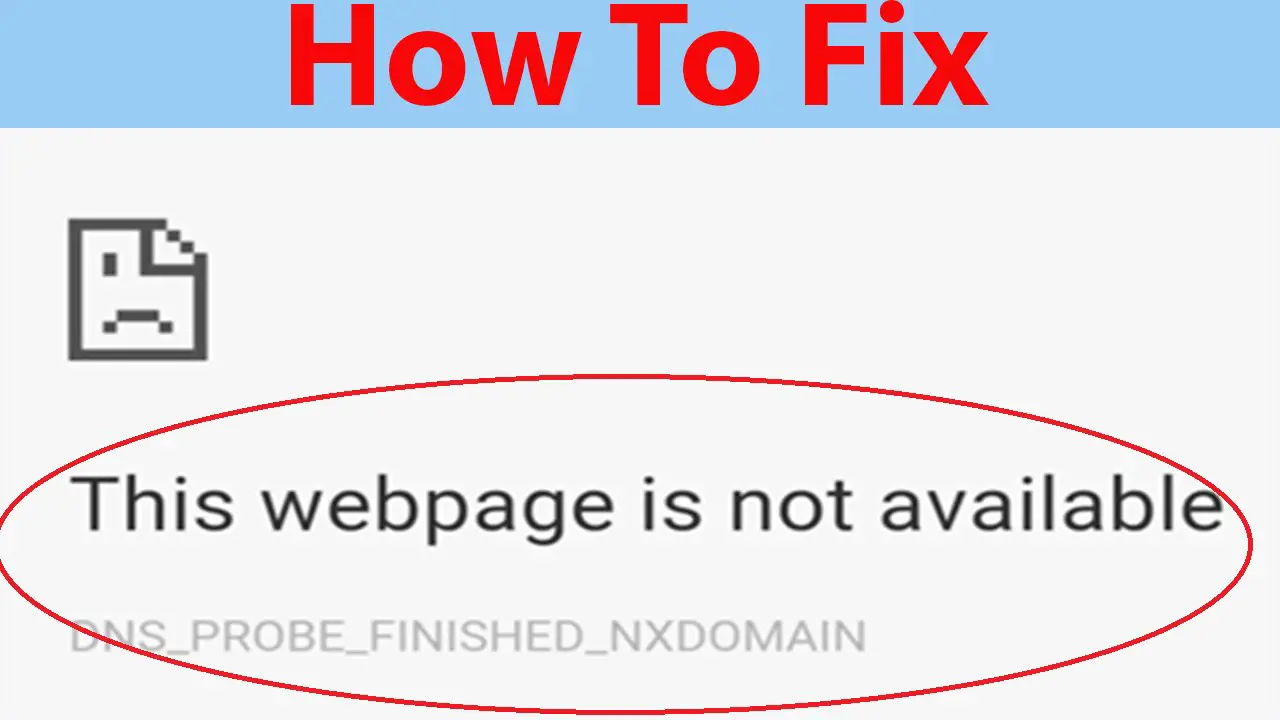
How To Fix This Webpage Is Not Available Error In Google Chrome
This page isn’t accessible is among the most frustrating problems on Google Chrome that many internet users are facing. If this error...

What is Android System WebView? Should You Delete it?
You may have encountered the Android System WebView when you were updating your apps in the Play Store. It is possible that...
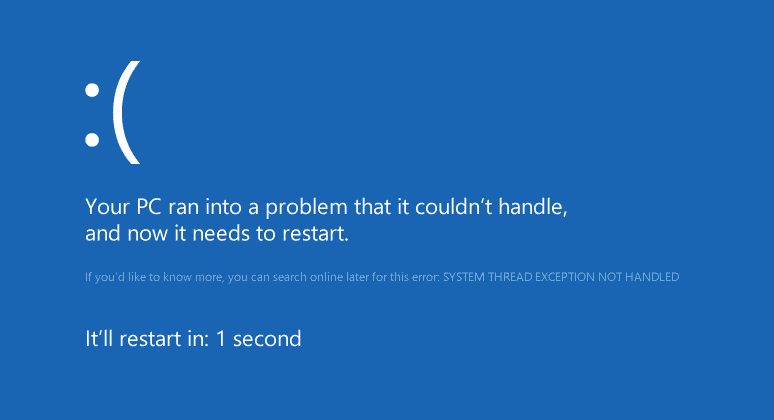
How To Fix System Thread Exception Not Handled Error
A helpful step-by-step guide to assist you in fixing the System Thread Error Not Handled error in Windows OS. If you are...
-
 List7 months ago
1337x Proxy List For 2022 [100% Working 1337x Mirror Sites]
-
Explained7 months ago
Why Did iMessage Turn Green Explained!
-
 How Tos7 months ago
How To Get A Specific Phone Number for yourself?
-
 List2 years ago
11 Best Music Players for Android Auto
-
 Explained7 months ago
How Can Monitors Be Connected By USB? (Explained)
-
Explained7 months ago
What is Android System WebView? Should You Delete it?
-
How Tos7 months ago
How To Fix This Webpage Is Not Available Error In Google Chrome
-
 Gaming7 months ago
Why Can’t I Connect to 5GHz WiFi On PS4? [Solved!]